
Maximizing Your Productivity as a Vue.js Developer: Essential Visual Studio Code Extensions


Using extensions in Visual Studio Code is extremely beneficial for developers. Irrespective of the editor that's been used. VS Code has almost become the default editor for programmers simply because it is lightweight and it is fully functional.
As a Vuejs Developer, using JavaScript and Vue.js extensions in Visual Studio Code can help you write better code, more efficiently, and with greater flexibility. Whether you're a beginner or an experienced developer, there's likely an extension that can help you improve your workflow and become more productive
They can help with formatting, scalability, enforcing best practices, and so automate so many of the forgettable tasks in our dev process. Adding the right extensions to Visual Studio can make your life as a developer so much easier and also it can be fun.
As a Vue.js and JavaScript developer, here are some of the popular Visual Studio Code extensions that you might find useful:
Volar - It's a must-have extension for Vue.js development, it provides Vue.js with specific features for improved code editing, such as syntax highlighting, code completion, linting, and formatting for Vue single-file components. It is an alternative to the popular Vetur extension, but with improved performance and features.
It helps you write and maintain high-quality Vue.js code, making your development process smoother and more efficient. It is compatible with both .vue single-file components, .js, .ts, .jsx, and .tsx files in your Vue.js project. It integrates with popular tools such as ESLint and Prettier, allowing you to enforce consistent coding styles and catch potential issues before they become problems. It is an alternative to the popular Vetur extension, but with improved performance and features.
To install Volar in Visual Studio Code, you can follow these steps:
Open Visual Studio Code.
Click on the Extensions icon on the Side Bar or press
Ctrl + Shift + X(Windows) orCmd + Shift + X(macOS) to open the Extensions view.Search for "V" in the search bar.
Click on the "Volar" extension in the results list.

Click the Install button to install the Volar extension.
After the installation is complete, click the Reload button if required.
You should now be able to use Volar for Vue.js development in Visual Studio Code.
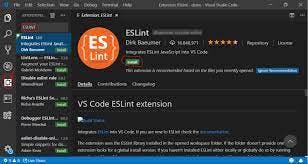
ESLint - This extension integrates linter into VS Code, providing real-time linting and error highlighting in your code.
It is a popular JavaScript linter that helps you identify and fix potential problems in your code, such as syntax errors, coding style issues, and semantic problems. It allows you to catch issues early and write high-quality, maintainable code.
To use ESLint in Visual Studio Code, you need to install the ESLint extension. You can follow these steps to install it:
these steps to install it:
Open Visual Studio Code.
Click on the Extensions icon on the Side Bar or press
Ctrl + Shift + X(Windows) orCmd + Shift + X(macOS) to open the Extensions view.Search for "ESLint" in the search bar.
Click on the "ESLint" extension in the results list.
Click the Install button to install the ESLint extension.
After the installation is complete, click the Reload button if required.
You can configure ESLint to work with your projects by creating an ESLint configuration file (e.g., .eslintrc.json) in your project's root directory. In the configuration file, you can specify the rules and settings that you want ESLint to use when linting your code.
Once you have installed and configured the ESLint extension, you should start seeing linting warnings and errors in your Visual Studio Code editor as you write JavaScript code.
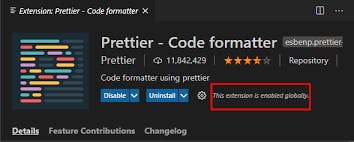
Prettier - It is a popular code formatter for JavaScript, as well as other programming languages. It helps you to automatically format your code according to a set of rules that you can configure, ensuring a consistent code style across your project. It helps you save time and effort, as well as avoid style-related arguments within your team.
To use Prettier in VSCode, you need to install the Prettier extension. You can follow these steps to install it:
Open Visual Studio Code.
Click on the Extensions icon on the Side Bar or press
Ctrl + Shift + X(Windows) orCmd + Shift + X(macOS) to open the Extensions view.Search for "Prettier" in the search bar.
Click on the "Prettier" extension in the results list.
Click the Install button to install the Prettier extension.
After the installation is complete, click the Reload button if required.
You can also configure Prettier to work with your projects by creating a Prettier configuration file (e.g., .prettierrc) in your project's root directory. In the configuration file, you can specify the rules and settings that you want Prettier to use when formatting your code.
Once you have installed and configured the Prettier extension, you can format your code in Visual Studio Code by either pressing Ctrl + Shift + I (Windows) or Cmd + Shift + I (macOS) or by running the "Format Document" command from the Command Palette. Prettier will then format your code, automatically fixing any style issues.
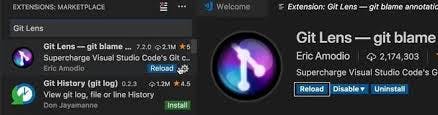
GitLens - This is an extension that makes it easier to view Git information and work with Git repositories in your code editor. It provides a variety of features, such as code-level annotations for Git blame, quick navigation to Git blame information, repository status information, and more.
With GitLens, you can quickly and easily see the Git history for your code, who wrote each line of code, and when it was written. This information can be valuable when reviewing code, debugging, or working on a codebase with multiple contributors.
To install GitLens in Visual Studio Code, you can follow these steps:
Open Visual Studio Code.
Click on the Extensions icon on the Side Bar or press
Ctrl + Shift + X(Windows) orCmd + Shift + X(macOS) to open the Extensions view.Search for "GitLens" in the search bar.
Click on the "GitLens" extension in the results list.
Click the Install button to install the GitLens extension.
After the installation is complete, click the Reload button if required.
You should now be able to use GitLens in your projects. If you encounter any issues during the installation process, you can consult the Visual Studio Code documentation or seek help from the GitLens community.
IntelliSense for CSS class names - This feature provides code completion for CSS class names in your HTML and JavaScript code. This can help you write code faster and reduce errors, as it makes it easier to find and use the correct class names in your code.
Several Visual Studio Code extensions provide IntelliSense for CSS class names, including:
CSS IntelliSense
Auto-Import for CSS Modules
VS code-styled-components
Each of these extensions has its unique features and capabilities, so you should choose the one that best fits your needs and preferences.
To install an IntelliSense for CSS class names extension in Visual Studio Code, you can follow these steps:
Open Visual Studio Code.
Click on the Extensions icon on the Side Bar or press
Ctrl + Shift + X(Windows) orCmd + Shift + X(macOS) to open the Extensions view.Search for the desired extension in the search bar.
Click on the desired extension in the results list.
Click the Install button to install the extension.
After the installation is complete, click the Reload button if required.
You should now be able to use IntelliSense for CSS class names in Visual Studio Code. If you encounter any issues during the installation process, you can consult the Visual Studio Code documentation or seek help from the community for the specific extension you are using.
Benefits of Using extensions in Vue.js
Some of the key benefits include of using these extensions include:
Improved Code Quality: They can provide linting, formatting, and code analysis tools that can help you write better-quality code. For example, the ESLint and Prettier extensions can enforce coding standards and catch potential issues before they become problems.
Increased Productivity: Extensions can provide features that make it easier to write and maintain Vue.js code, such as code completion and syntax highlighting. This can help developers write code more quickly and efficiently, increasing their productivity.
Better Integration: They can help integrate VSCode with other tools and services, such as Git or GitHub. This can streamline the development process and make it easier to manage code repositories.
Providing Specific Features for JavaScript and Vue.js: Many extensions provide specific features for Vue.js development, such as debugging tools, code snippets, and project templates. These features can help you work more effectively with these Vue.js and save time.
In summary, using Vue.js extensions can help you write better code, more efficiently, and with greater flexibility. Whether you're a beginner or an experienced developer, there's likely an extension that can help you improve your workflow and become more productive.